With the help of custom fields you can depict individual data and structure a project more specific.
Conditions for custom fields
The basic requirements for the use of the custom fields is a Business or Professional Cloud.
Only as an admin you are able to create custom fields in the central administration, whereas the concrete selection and assignment to tasks, packages or projects can be done by responsible project officers.
As an admin you can also make direct allocations to projects, as long as you are in the creation process. Likewise, the admin can decide whether a custom field should be used globally.
Guest users, on the other hand, can not see or edit custom fields.
Create custom fields
To create a custom field click on “Settings” in the main menu and then again on “Settings” in the upper ribbon. Afterwards select the menu item “Custom Fields” and click on “Create new field”.
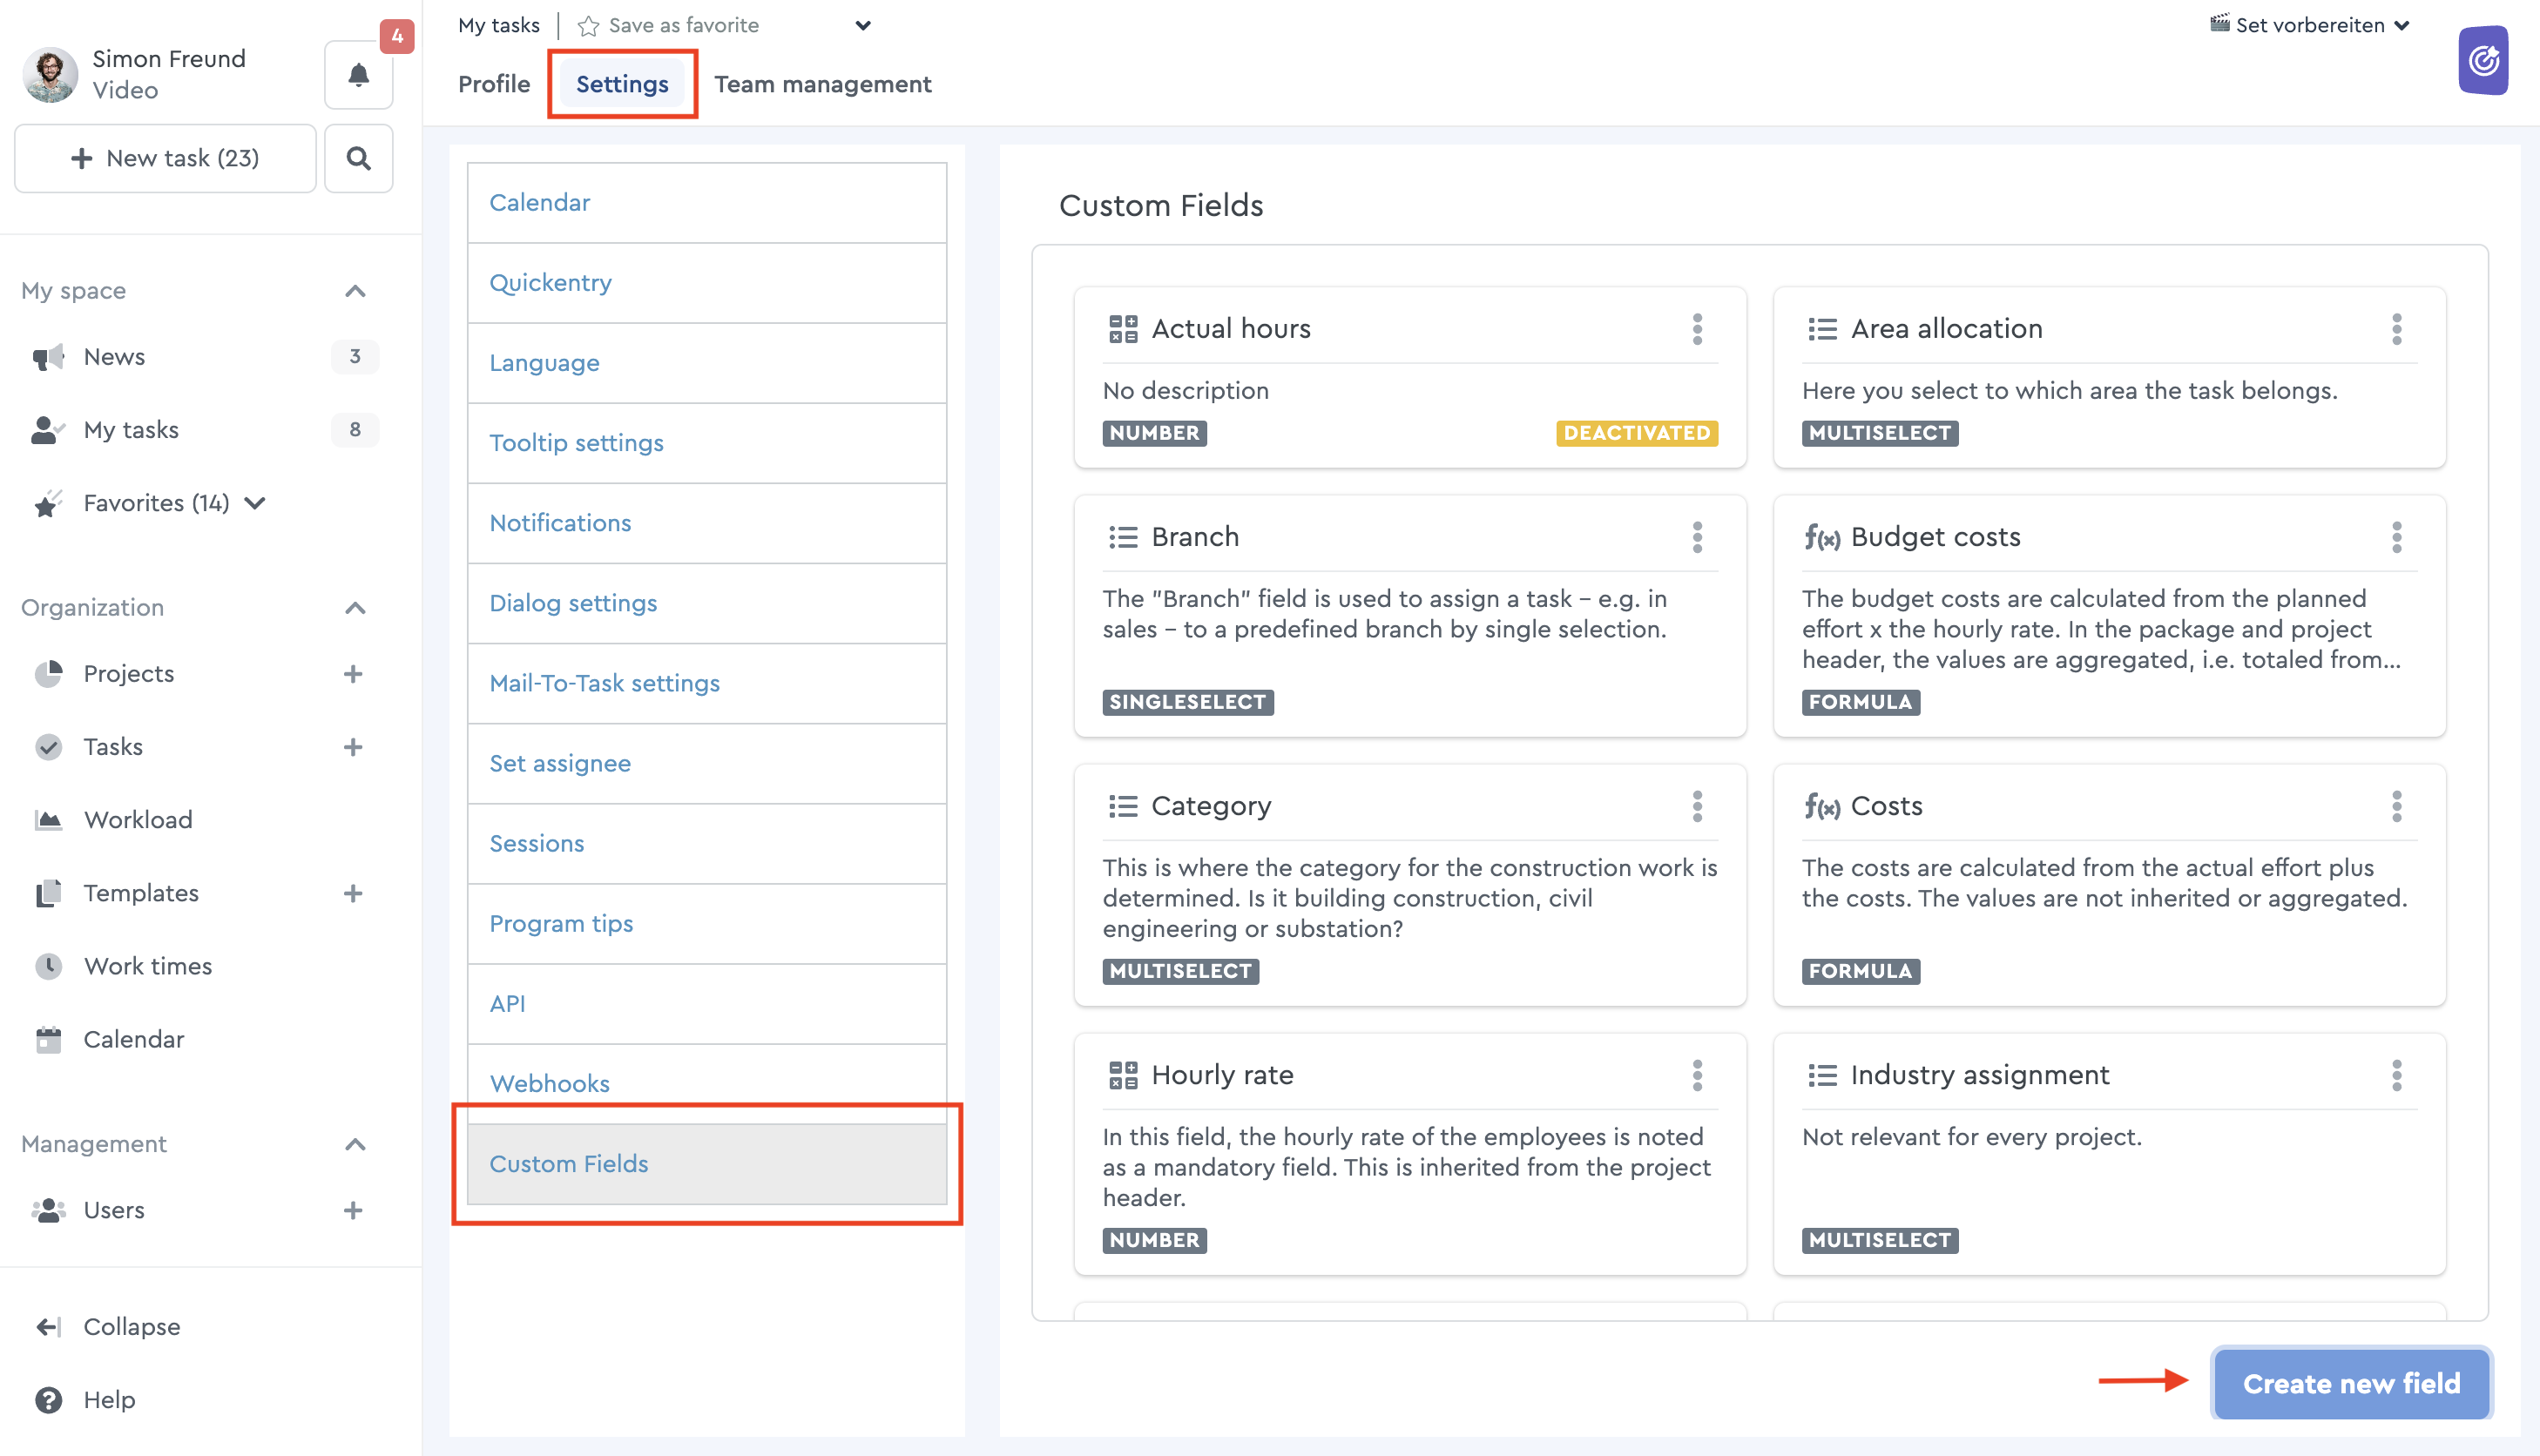 This is how you create a custom field
Alternatively, you can also click on the project header in the project in which you want to create a new custom field and click on the menu item “Manage custom fields” via the three dot menu. Afterwards you can choose the item “Add new custom field”. This is only possible as an admin.
 Alternative way: creating a custom field
Please note :In the standard settings, there are 15 custom fields to choose from. Do you need more individually customizable fields for your project? No problem! Do not hesitate to contact us for more information.
Select field types
In the first step you assign a label, which describes your proposition, for example customer number, costs or working hours. The ID is generated automatically from the field label, but can be modified manually as well. Be careful not to allow multiple custom fields to exist with the same ID, otherwise you can not proceed with your configuration.
In the basic settings of the custom fields you can choose between six different field types, each of which is used for different purposes.
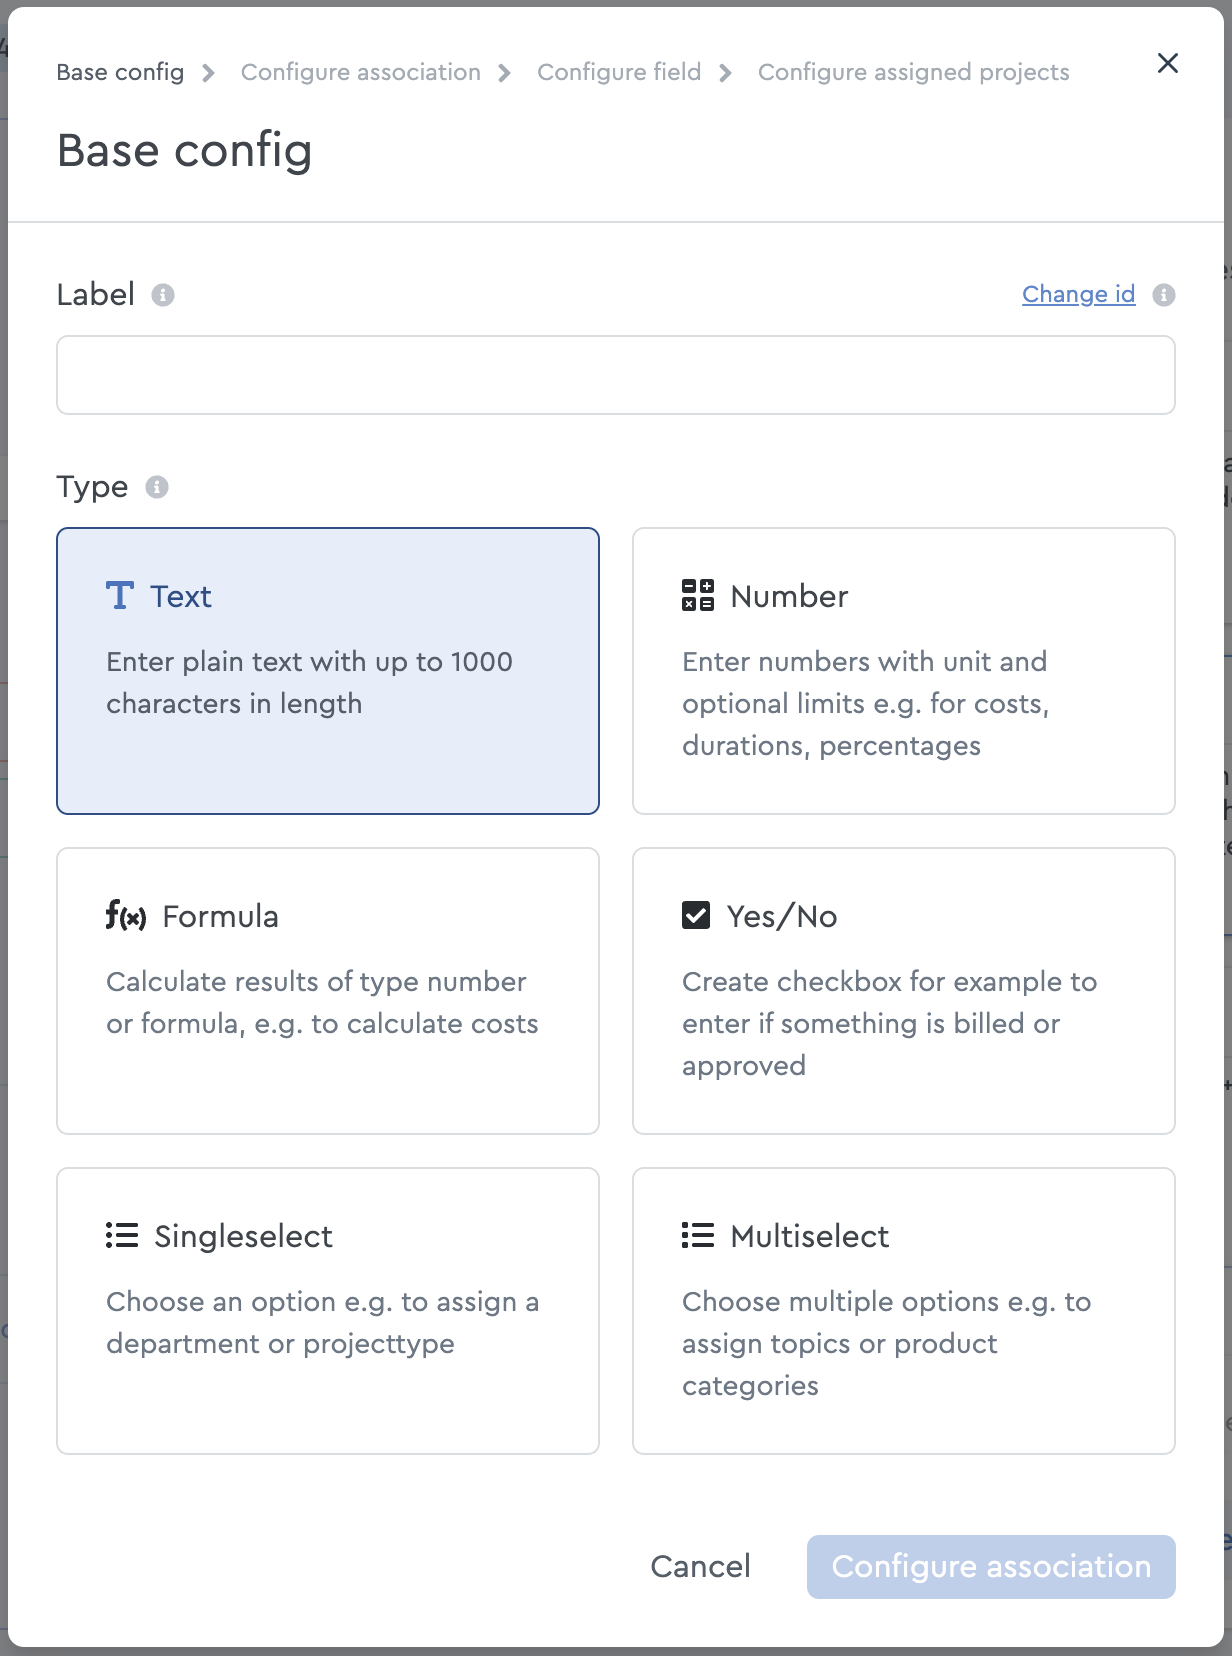 Choose from six different field types
- Field type “Text”: With the text field you can add text elements like custom numbers, content-related notes or remarks.
- Field type “Number”: For capturing costs, duration or percentage value you can enter number values of arbitrarily definable units with optional limits.
- Field type “Formula”: You can use the formula field to calculate complex values. For example calculations of hourly rate wages multiplied by the time needed for the customer.
- Field type “Yes/No”: You can use this field as a hedge, for example, to make sure whether a project has already been billed or not.
- Field type “Singleselect”: Via the dropdown menu you can choose an element from a list, for example a department or location.
- Field type “Multiselect”: With the help of the dropdown menu you can select more than one element, such as product categories or topic areas.
Select the field type that best suits your purpose and click on “Configure association”.
Configure association
In the next step you decide on which level the custom field should be available. Note here, that the field is only displayed in a task or package if it has been activated in the respective project.
After that you define how the custom field should behave across levels.
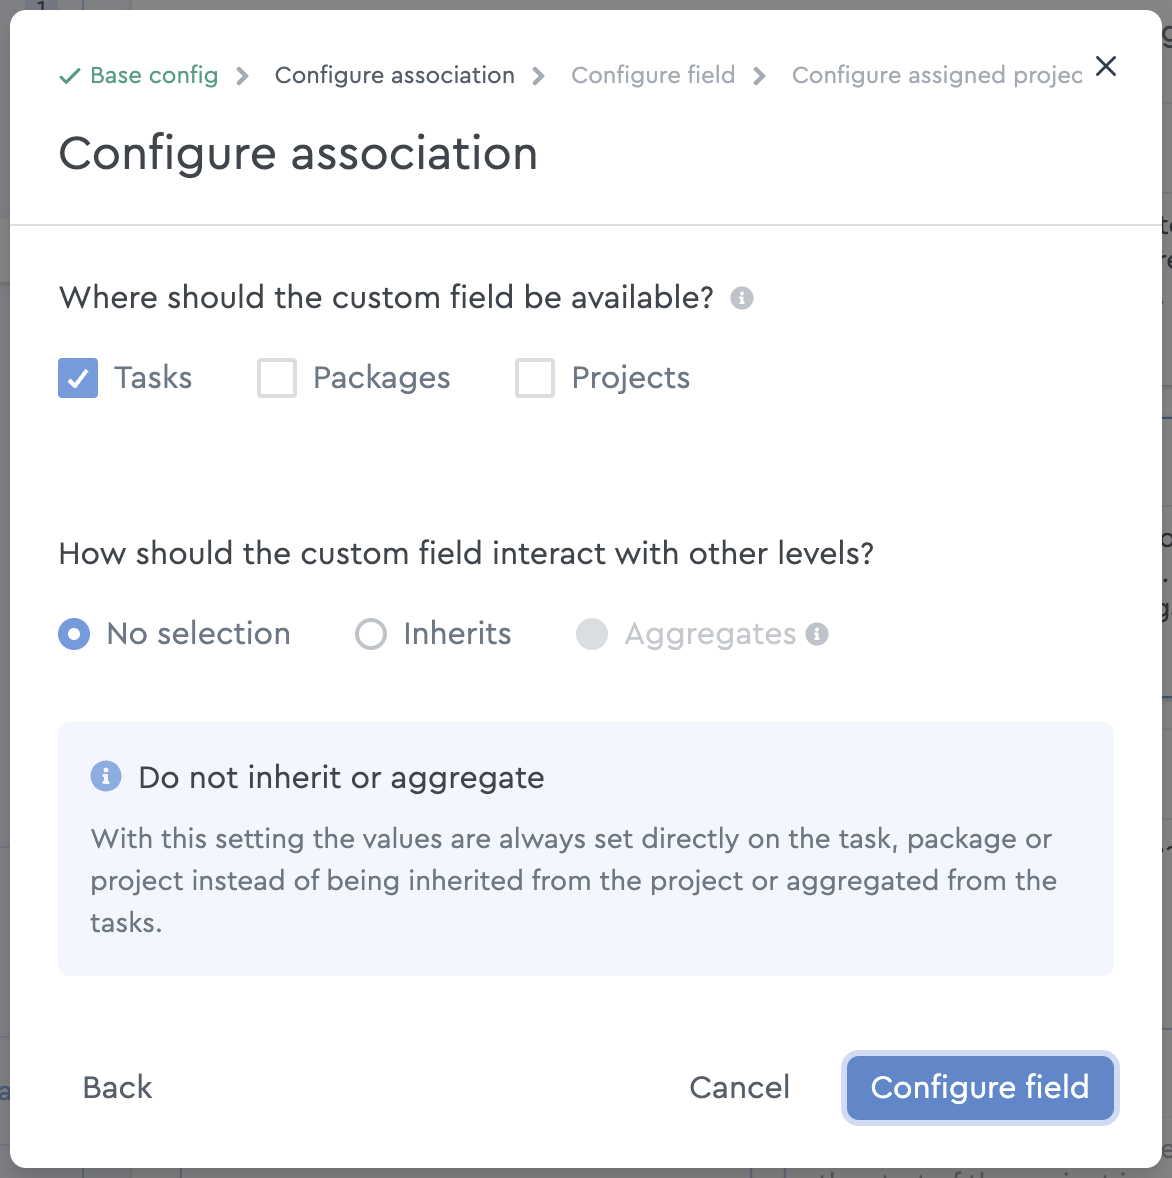 Configuration of the assignment
No selection
If you do not make a selection, the values are only added individually to the task, package or project. The choice of the custom field will then be made separately.
Inherits
This setting provides that all tasks and packages of a project automatically adopt the value set in the project, this value is thus inherited.
Inheritance is useful, for example, when depicting an hourly wage or text fields.
Aggregates
With the aggregation method the values from the corresponding tasks in packages and projects automatically add up, so that ,for example, cost for a project are added.
Click on “Extended settings” to use a different aggregation type and to determine, for example, an average value or the minimum/maximum.
Set field details
In the next step you add details to the fields, while first selecting whether this is a mandatory field or not, i.e. the field must have a value or can be empty.
If this is a mandatory field, a preallocation must be configured, which will be used as standard until a manual value is set, e.g. the hourly rate of employees.
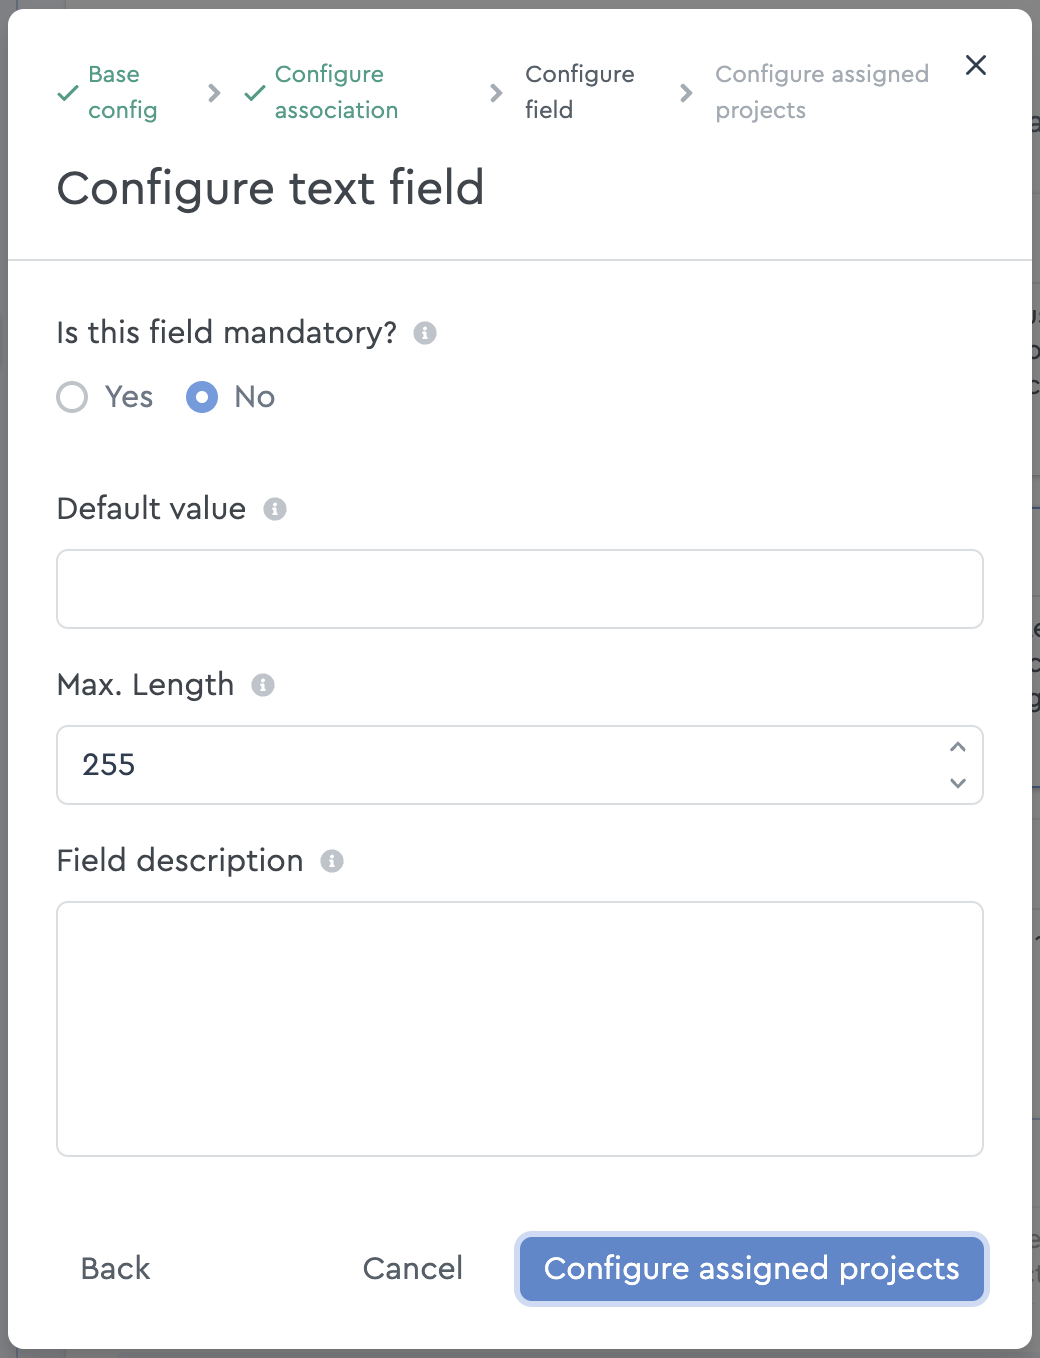 Configuration of the text field
Afterwards you can add a field description, which will help other team members to understand what the field can be used for and how it should be used.
For number fields, the minimum and maximum value, as well as a unit and decimal place are defined. Formula fields require a unit, decimal place and the formula to be applied.
Now you can decide if the field should be used globally in all projects, if you want to use it by default, or not. At this point, it is also possible to assign the field directly to a specific project.
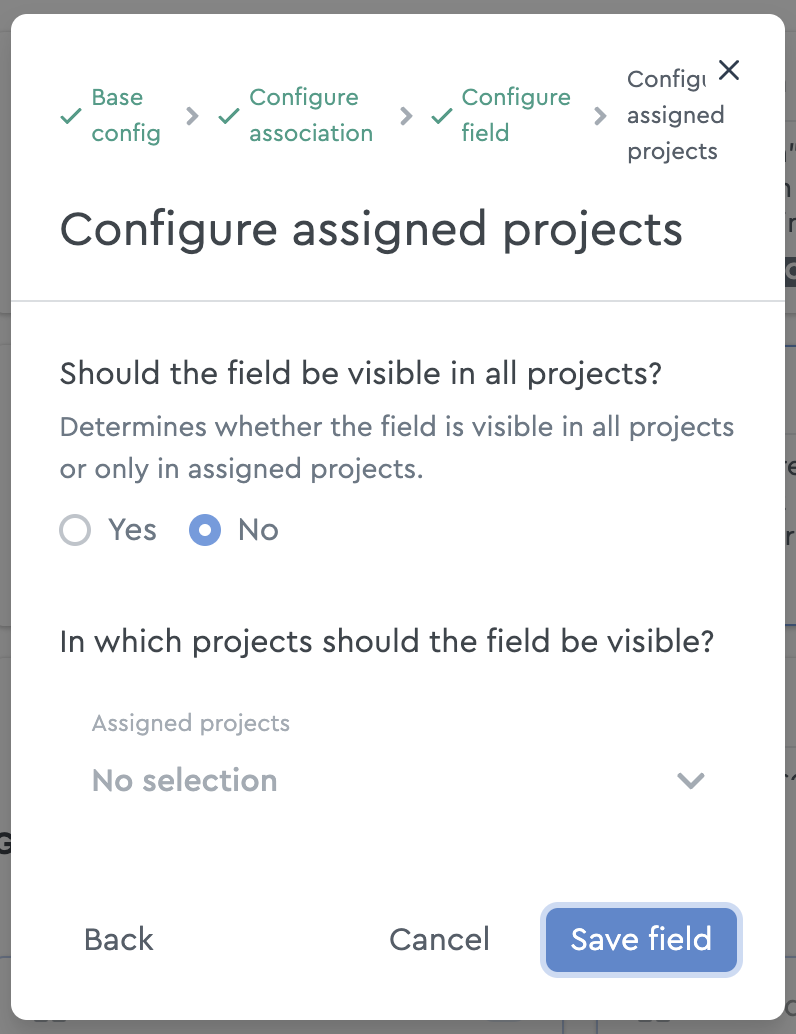 Global or specific project assignment is already possible during creation
Finally, click on “Save fields” to create the custom field. It will then be displayed in the overview.
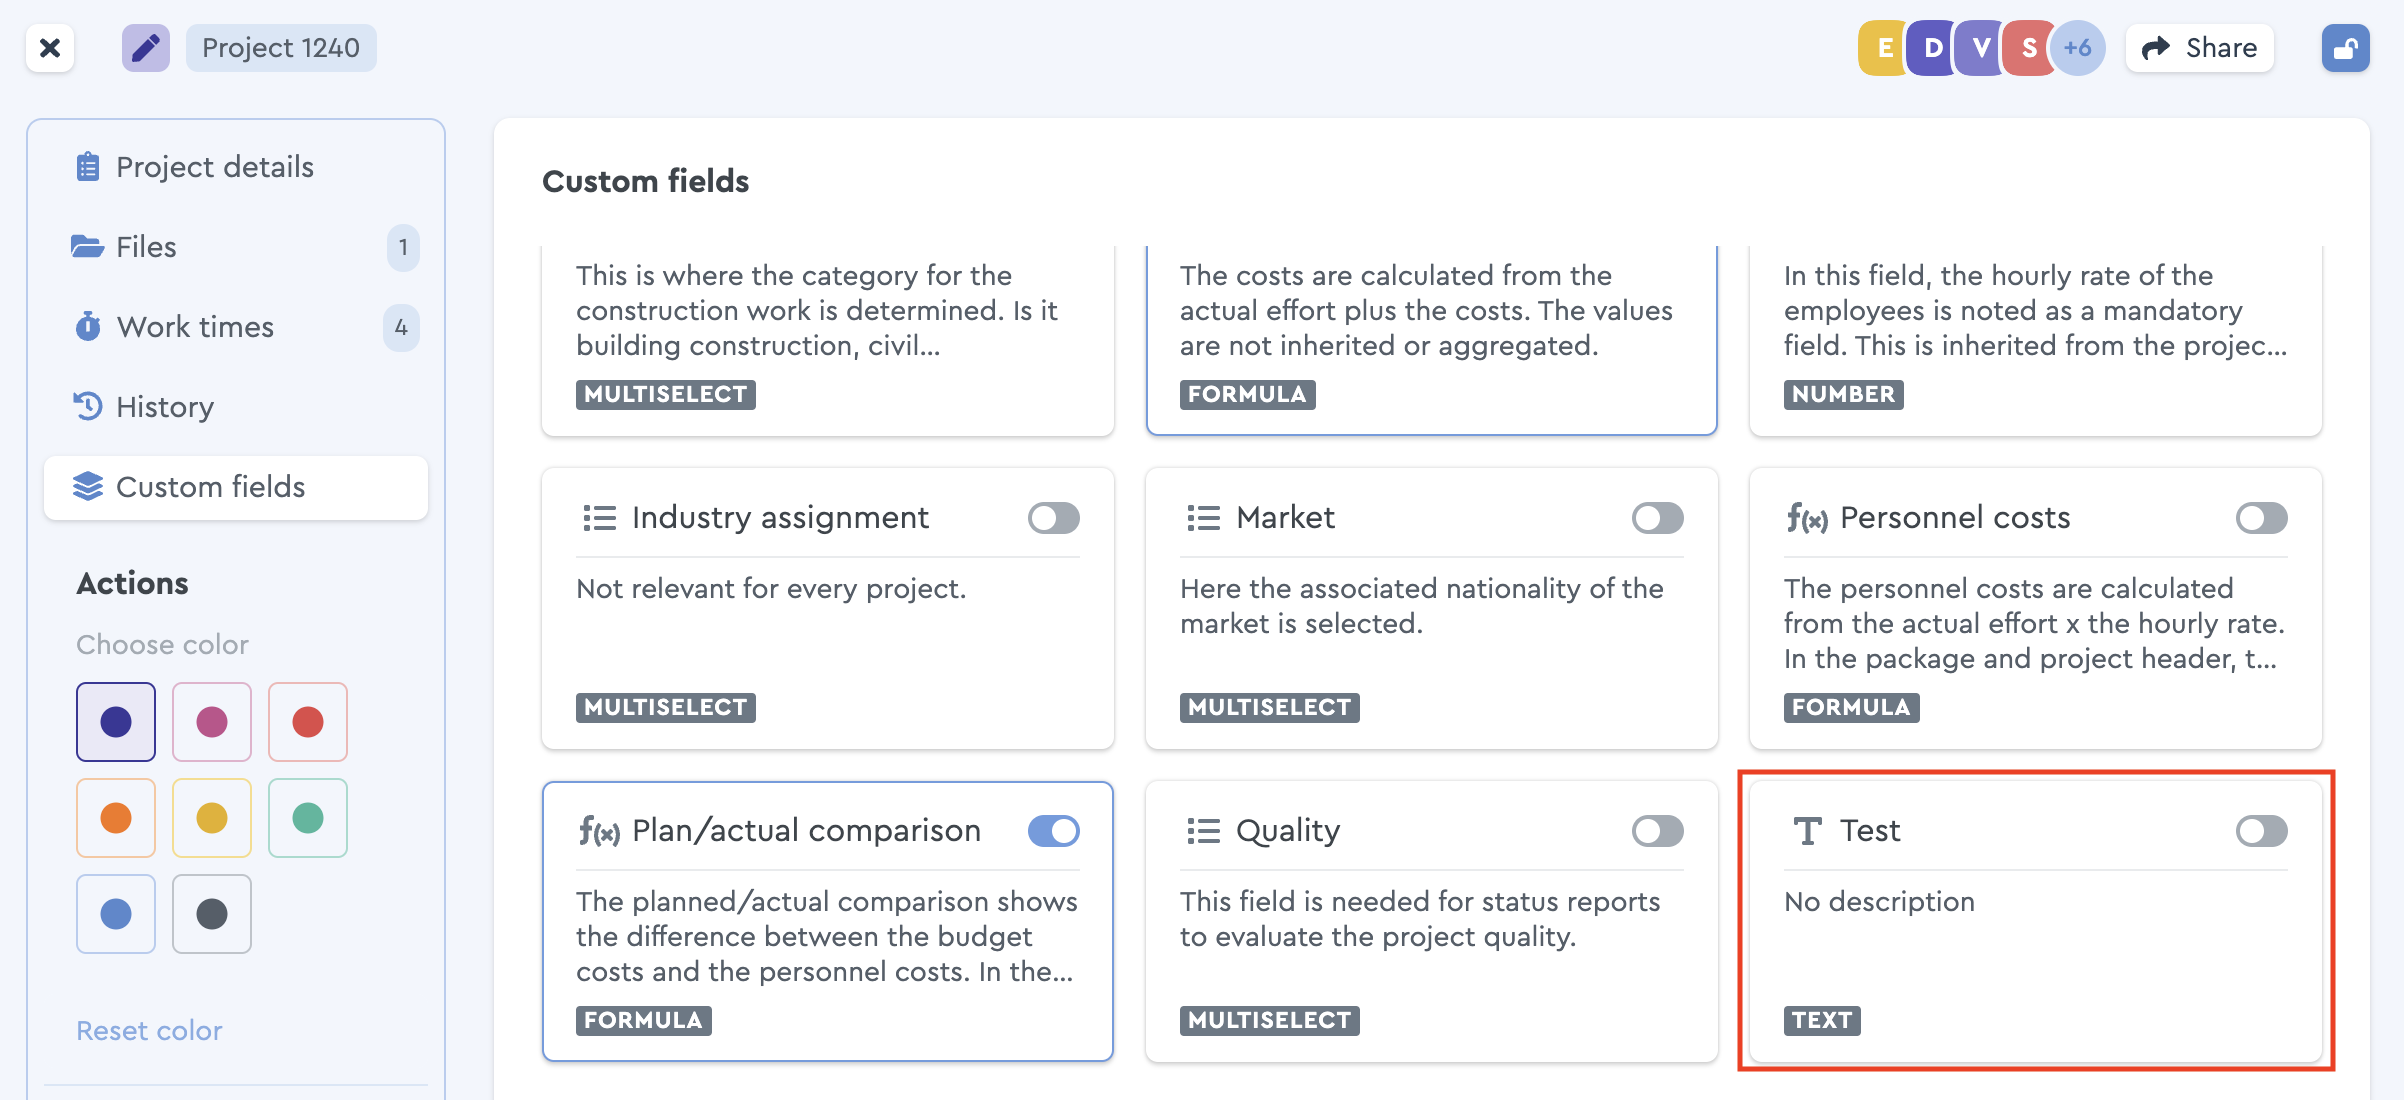 Overview with the new custom field